A guide to outdoor cooking
We found this article quite helpful. For experienced bbq-ers and novices alike.
Published in the Toronto Star, May 22, 2019
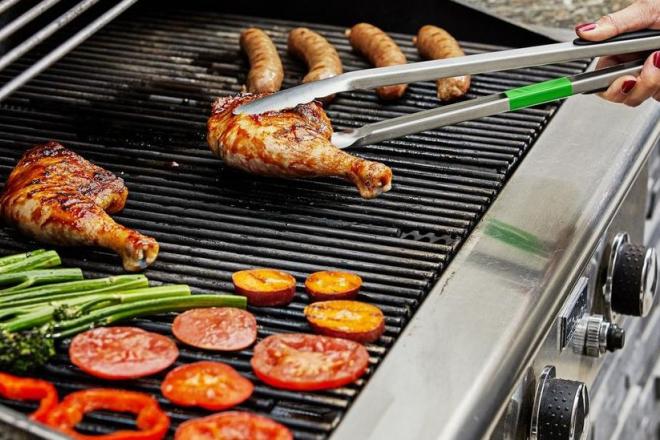
I hear the siren call of the grill year-round, but in spring and summer it seems like everyone wants to get outside and cook. I love grilling for these reasons: The convection heat of an outdoor grill provides texture and flavour to vegetables, fruit, meat and fish. During cooking, extra fat renders and drips away from the food, so grilling can be healthful to boot. I say it’s the best way to cook, bar none!
This guide from The Washington Post and America’s Test Kitchen lays out the basic tools and techniques for success, including some of my favourite food-preparation tips. Chances are, you own or have access to a gas grill, so this guide is primarily geared toward that. But you’ll find that much of the information applies for charcoal grillers, as well.
Getting started
You don’t have to spend a lot for a basic tool kit, whose items are widely available:
- Two pairs of long-handled, locking tongs (for raw and cooked foods). Use red tape to label one pair for raw foods and green tape to label the other pair for cooked foods. This helps prevent cross-contamination.
- Instant-read thermometer, to make sure the interior of the food is properly cooked.
- Oven/grill thermometer for grills that don’t have an inset or working thermometer.
- Heavy-duty mitts (preferably long) to protect your hands and forearms as you baste and turn hot food on the hot grill.
- Long-handled lighter to ease fire ignition in hard-to-reach gas grills and for lighting fire starters.
- Heatproof tray, such as rimmed baking sheet, for carrying/gathering your supplies.
- Silicone bristle basting brush for sauces applied at the end of the cooking time.
- Resealable zip-top bags for oiling and pre-prepping your food.
- Heavy-duty aluminum foil for cleaning the grill (crumple up, hold by tongs).
For charcoal grillers:
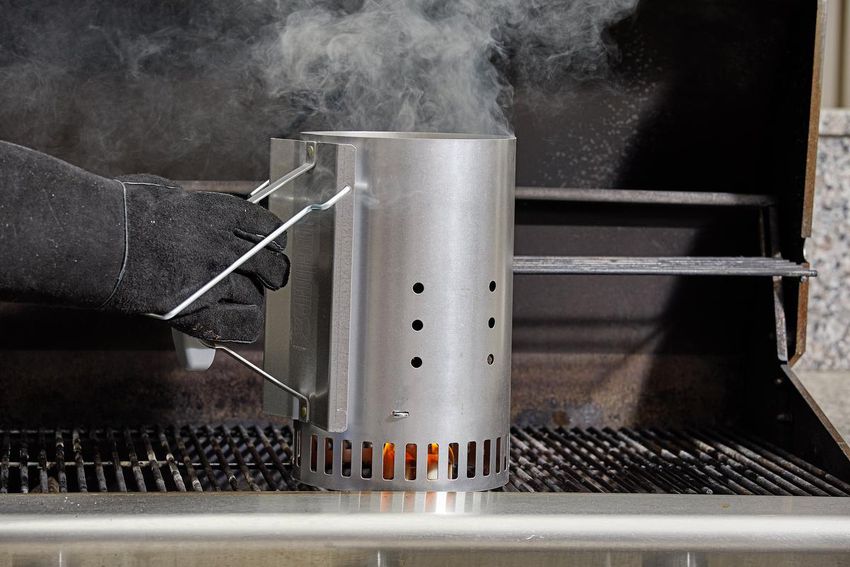
- Chimney starter for lighting charcoal briquettes or lump charcoal.
- Fire starters: non-toxic, odourless cubes that make lighting charcoal a breeze.
Preheating
This is a must, and the first step in cleaning the grill. Think of it as a sterilization process. Turn all gas-grill burners on HIGH, so the grill reaches its maximum temperature for 10 minutes. Next, crumple up foil into a ball about the size of an orange, hold it with your long-handled tongs and use it to clean the grill grates; or use a special, sturdy metal-bristle brush you trust. Then, reduce the temperature you need for cooking.
For a charcoal grillers: You want to build a fire in a chimney starter and let the flames burn until all the briquettes or lump charcoal are covered with a white-grey ash. Pour them onto the charcoal grate and put the lid on the grill, making sure the air vents are open all the way. Keep the lid on the grill for five minutes, then clean the grill grates and start cooking. You may need to adjust the lid vents to reduce the temperature.
Using direct vs. indirect heat
Use direct heat — the food is directly over the heat source — when the food takes less than 20 minutes to cook. Examples: sliced vegetables, shrimp, burgers, hot dogs, cooked sausage and boneless, skinless chicken breasts.
For charcoal grillers: Spread a layer of gray-ashed charcoal evenly across the charcoal grate.
Use indirect heat — the heat is on either side of the food, with the burners under the food turned off — when your food takes longer than 20 minutes to cook. Examples: bone-in chicken pieces, roasts, fresh sausages, whole chickens and turkeys.
For charcoal grillers: Build two piles of white-ash charcoal on either side of a disposable drip pan.
The exception to these rules is delicate foods such as fish fillets, which call for indirect-heat grilling because it is gentler and more forgiving.
Once you master these two methods, you can use a combination of them to up your game: Sear a large piece of food over direct heat before finishing it over indirect. This works well for most steaks, chops and roasts. It is also how you “reverse sear,” starting with indirect heat and then searing a steak or chop over direct heat at the end of the cooking time.
Season simply, with the trilogy
Extra-virgin olive oil prevents sticking, keeps foods juicy and promotes caramelization/grill marks. But note: Oil the food, not the grill grate. Why? Because the oil on a preheating grate will start to burn and become tacky. Your food won’t stick when it is brushed all over with a thin coat of olive oil and placed on a clean cooking grate. Also, the coating will act as a barrier, preventing natural juices/water in the food from turning into steam and evaporating. That means your food won’t dry out before it’s done.
My bag trick will save time, coat your food sparingly and evenly, and keep your hands grease-free. It is also a handy and sanitary way to carry food to the grill. Here’s what to do: Place your prepped food in a resealable zip-top bag and pour in a little olive oil. Seal and massage the food through the bag to give it a thin, all-over coating. Keep the bag refrigerated until you’re ready to cook.
Salt brings out the flavour in just about anything. Season your food with salt after you have coated it with the oil and just before it goes on the grill, otherwise the salt will draw the juices to the surface. Start with a pinch; there is a fine line between just right and too much. It’s easy to add but almost impossible to subtract.
Pepper is not quite as essential as the first two items in this trilogy, but I am a fan of black pepper for grilling. A coarse or flaky “butcher grind” is preferable, because it will not bring as much heat to your food as a finely ground pepper (dust).
Prepping the favourites
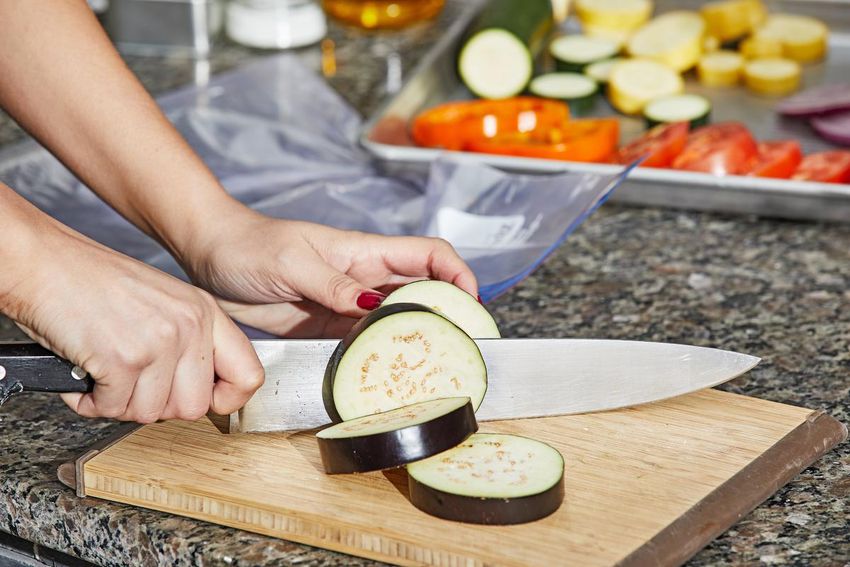
Vegetables headed for the grill should be cleaned and cut in slices that won’t fall through the grates, about ½-inch thick. Recommended for direct-heat grilling: asparagus, bell peppers, squash, zucchini, eggplant, corn in the husk, scallions and onions; also large strawberries, melon and bananas (in their peels).
To be grilled over indirect heat: firm, whole vegetables such as potatoes, carrots, heads of garlic, artichokes, large mushrooms such as portobellos. Prep them with the grilling trilogy; also, whole fruit including apples, pears, peaches, apricots, etc. Many of these will benefit by a short amount of time directly over the heat to get grill marks but will be primarily cooked with indirect heat. (Technically, that would be a next-level, combination method.) For great grill marks, place your (direct-heat) food across the grates from left to right. I cut squash and zucchini lengthwise and place them across the grates.
For fish and seafood, I almost always use indirect heat, and that includes grilling whole fish, large shellfish, lobster and crabs. Sticking to the grate is a common problem when you’re cooking fish on the grill, so here are a couple ways to avoid it. Place your fish on cedar planks; I do almost every time I grill fish. It works exceptionally well and makes a rustic presentation.
You also can use the fish skin itself — detached. Ask your fishmonger to cut the skin from the fillet, or do it yourself. Cut the fillet into serving-size portions and season them. When you’re ready to cook, place the skin, scaled side down, directly on the cooking grate. Place the fillet portions on the skin, as if you were reconstructing the fish. The portions won’t stick, although they will slightly re-adhere to the skin; they can be removed easily by sliding a thin, heatproof spatula between the skin and the fish. You can leave the skin on the grill just long enough to crisp up, then serve it along with the fillets.
I don’t use foil because fish can stick to it — and foil reduces the amount of “grilled” smoky flavour that is imparted to the fish.
Exceptions to my indirect-heat rule include firm seafood steaks such as tuna, swordfish and small shellfish and bivalves (in the shell) such as shrimp, oysters, clams and mussels that are best grilled over direct heat.
To make really good beef burgers, start with a custom blend. Cuts to choose from include brisket, chuck, sirloin, short rib, hanger steak, aged rib-eye trimmings. Keep the mix free of filler add-ins (bread crumbs, eggs), don’t overwork the meat, use a light hand to shape the patties and season them lightly just before grilling. They may not look perfect, but don’t worry, they’ll taste perfect!
When you shape the patties, place your thumb at the centre and press down; this divot will keep your burgers from mounding as they cook — I call it swollen-belly syndrome.
Cleaning, the last word
Always brush hot cooking grates after you cook. Repeat that same step you used to preheat the grill: Crank up the heat to high and let it go for 10 minutes, then brush. These two steps will keep the cleaning easy. If you have a lot of residue left from your last grilling session, let it run for 30 to 40 minutes — or until everything on the grates has turned to a white-grey ash.
For charcoal grillers: Light the coals and let them burn with the lid on the grill until you can brush the grates clean.
Once a year, clean the inside of the grill with warm, soapy water — no abrasives. Make sure you rinse the grill well and let it preheat with all burners on high for 30 to 40 minutes to burn off any residue. And although most grill grates are dishwasher-safe, I don’t go that route, because it strips the grates of all their seasoning — the “good stuff.”
Now you are ready to get outside and get grilling.